
Home > Configuration Options
Configuration Options
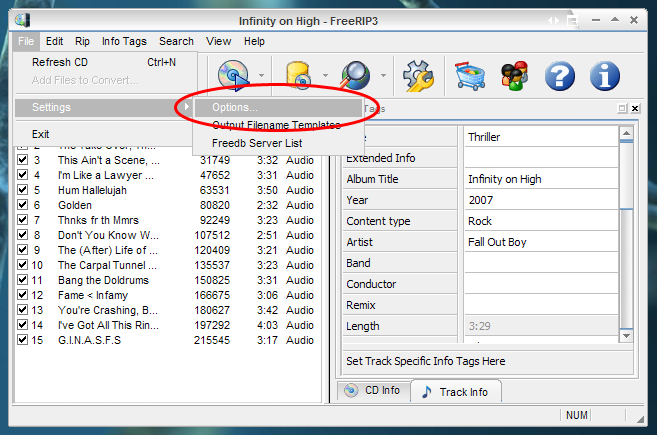
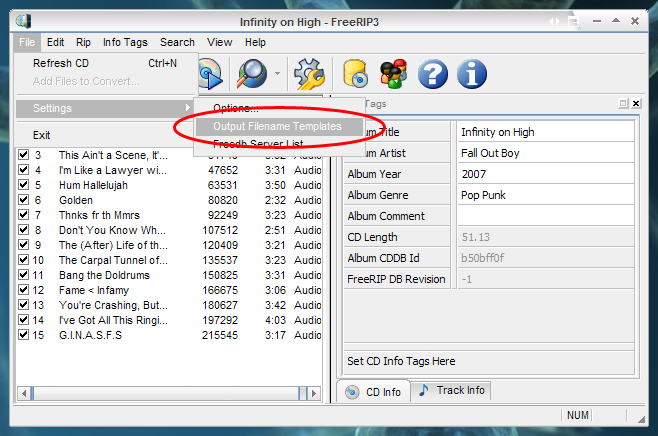
To open the options, click File > Settings > Options
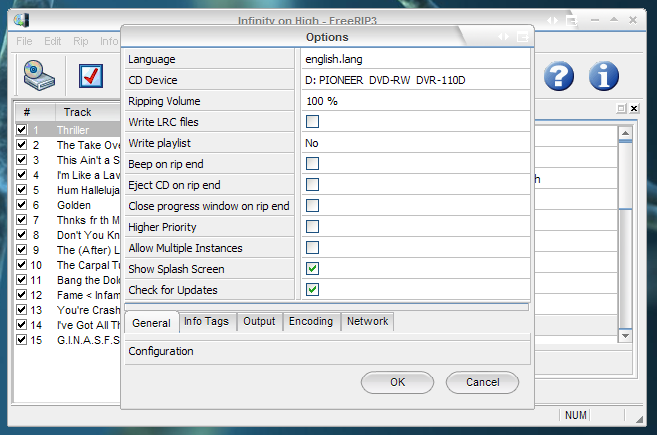
Now we will go through all the options in the General tab:
| Language: | Change the language of the program |
| CD Device: | If you have two media drives on your computer you can choose which one you want to use here |
| Ripping Volume: | Increase or decrease the volume of the tracks by percentage |
| Write LRC Files: | If there are lyrics stored on the CD FreeRIP can make LRC files for them |
| Write Playlist: | Make a playlist for the files you rip |
| Beep on rip end: | Choose whether or not you want a sound to be played when the the tracks are finished ripping |
| Eject CD on rip end: | Choose whether or not you want the drive to open when the ripping is finished |
| Close progress window on rip end: | Choose whether you want the progress window to automatically close when the ripping is finished |
| Higher Priority: | Run the ripping/conversion service at a higher Windows priority |
| Allow multiple instances: | Whether or not to allow multiple FreeRIPs to be open at once |
| Show splash screen: | Choose to show or hide the splash screen at startup |
| Check for updates: | Allow FreeRIP to send anonymous data to the Greentree Applications server in order to check if you have the latest version installed |
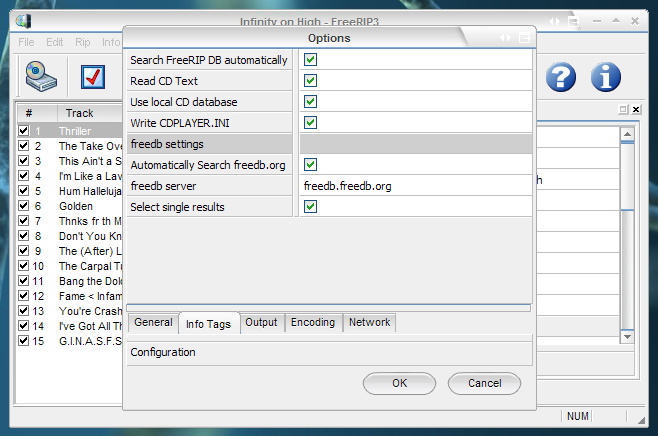
Next is the Info Tags tab:
| Search FreeRIP DB automatically: | Choose whether or not to search the FreeRIP CD database for your CD info |
| Read CD Text: | If your CD has text stored on it, FreeRIP will get the tags from there |
| Use local CD database: | If you have ripped from that CD before, FreeRIP has automatically stored the info on your computer (in FRM3_db.ini). If this option is selected, FreeRIP will look there before it tries to search online, saving you time and more importantly retrieving the changes you made last time |
| Write CDPLAYER.INI: | Stores the CD information in cdplayer.ini |
| Automatically Search freedb.org: | If this is selected, FreeRIP will search freedb if the information isn't already in the FreeRIP database |
| freedb server: | The address of the freedb server |
| Select single results: | This option automates the freedb results fetching process. When it is selected, if there is one result in the freedb database for your CD it will automatically use it instead of showing you an options box with only one result |
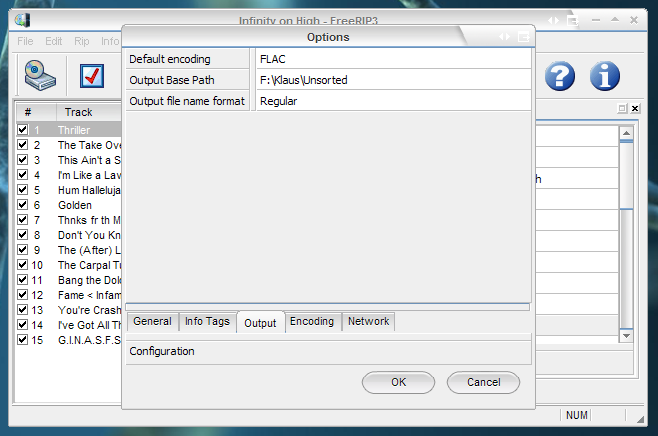
Next is the Output tab:
| Default encoding: | Choose which file format you would like FreeRIP to convert to by default. The options are WAV, MP3, Vorbis, WMA or FLAC |
| Output Base Path: | This is where the output files will be placed. By default it is your Windows desktop |
| Output file name format: | This option allows you to select the filenames and folders of your output files. There is more about this option near the bottom of the page |
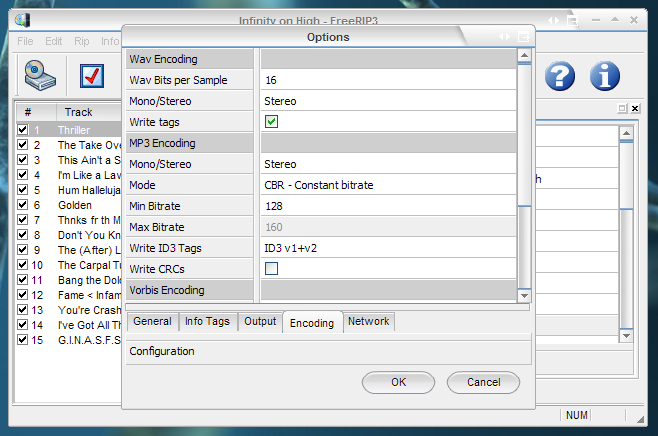
Next is the Encoding tab:
Wav Encoding: |
|
| Wav Bits per Sample: | Choose whether you want 8 or 16 bits per sample when you rip or convert to WAV format |
| Mono/Stereo: | Choose between Mono (no differentiation between both speakers) or Stereo (both speakers have unique audio) |
| Write tags: | Write the information tags to the WAV file |
MP3 Encoding: |
|
| Mono/Stereo: | Choose between Mono (no differentiation between both speakers) or Stereo (both speakers have unique audio) |
| Mode: | Bitrate modes. CBR means the file will always be at the same bitrate, VBR means the file will go between a minimum and maximum bitrate and ABR means the bitrate will vary but will stay at around the bitrate you specify |
| Write ID3 Tags: | Choose whether to include version 1, version 2, both or no ID3 tags |
| Write CRCs: | Write the Cyclic Redundancy Checking information |
Vorbis Encoding: |
|
| Mono/Stereo: | Choose between Mono (no differentiation between both speakers) or Stereo (both speakers have unique audio) |
| Quality: | Choose the quality of the OGG file, -1 being the worst and 10 being the best |
WMA Encoding: |
|
| WMA Quality: | Choose the bitrate of the WMA file, between 28 kbps and 128 kbps |
FLAC Encoding: |
|
| Mono/Stereo: | Choose between Mono (no differentiation between both speakers) or Stereo (both speakers have unique audio) |
| FLAC quality level preset: | Choose the quality of the FLAC file, 0 being the worst and 8 being the best |
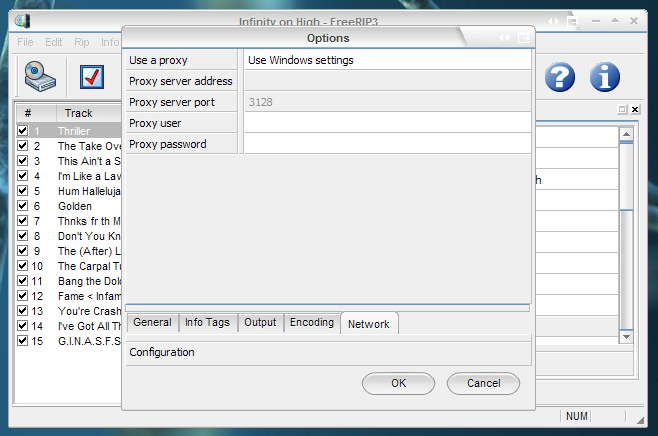
Next is the Network tab:
| Use a proxy: | The settings on this tab are regular proxy options. |
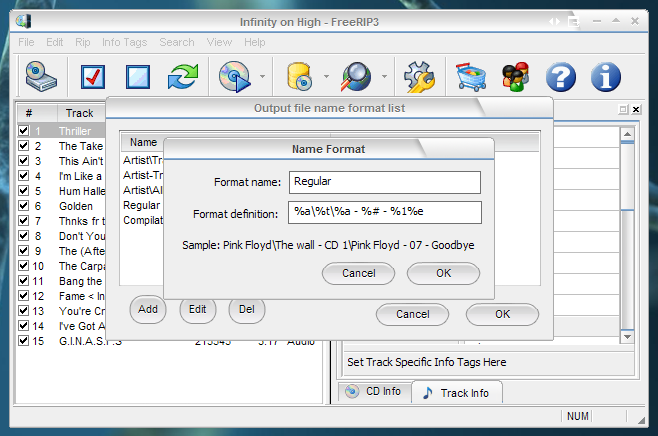
Lastly I will show you how to customize your output filename templates. You can access the custom template options by clicking File > Settings > Output Filename Templates
You can add, edit or delete templates by clicking the buttons.
By default FreeRIP creates a folder named after the artist, then the files are named "Track Number-Track Title".
There are many combinations you can use in your customized templates. For example, for the Fall Out Boy album I am using, I could enter:
%a\%t\%a - %# - %1%e
Which would output the first file as:
Fall Out Boy\Infinity on High\Fall Out Boy - 01 - Thriller.mp3
Here is a list of the various codes you can use and what they mean:
| %#: | Track number |
| %1: | Track title |
| %2: | Track extended info |
| %a: | Artist name |
| %b: | Band name |
| %c: | Composer |
| %d: | CDDBID |
| %e: | File extension |
| %f: | Comment digest |
| %g: | Genre |
| %h: | Media type |
| %i: | ISRC |
| %j: | Conductor |
| %k: | Mood |
| %l: | Lyricist |
| %m: | Track time (Format: mm,ss) |
| %o: | Full comment |
| %t: | Album title |
| %y: | Album year |
Previous (MP3 Tagger) | Next (Advanced Features)
